It’s never too early to think about the holidays so let’s talk turkey. There’s a lot of meal planning to do ahead of a holiday meal – and the turkey is top priority. There are a few things you need to decide before the big day.

First, how many mouths do you need to feed? This will help determine the size of the bird you need to buy (and how long it will take to thaw & cook). Next, how are you going to season it? You can do a wet brine, dry brine, a simple spice rub, stuff the cavity with your favourite veggies – there are too many options to list. But this will ensure you put your tastiest turkey on the table. Finally, how are you going to cook it? You can use a roaster oven, slow cooker (for smaller turkeys or just the turkey breast), or your standard oven. Decisions, decisions.
This holiday season we are feeding a crowd with this dry-brined turkey. We’ve done wet brines in the past, but dry brining is a great (and honestly a little bit easier) option.
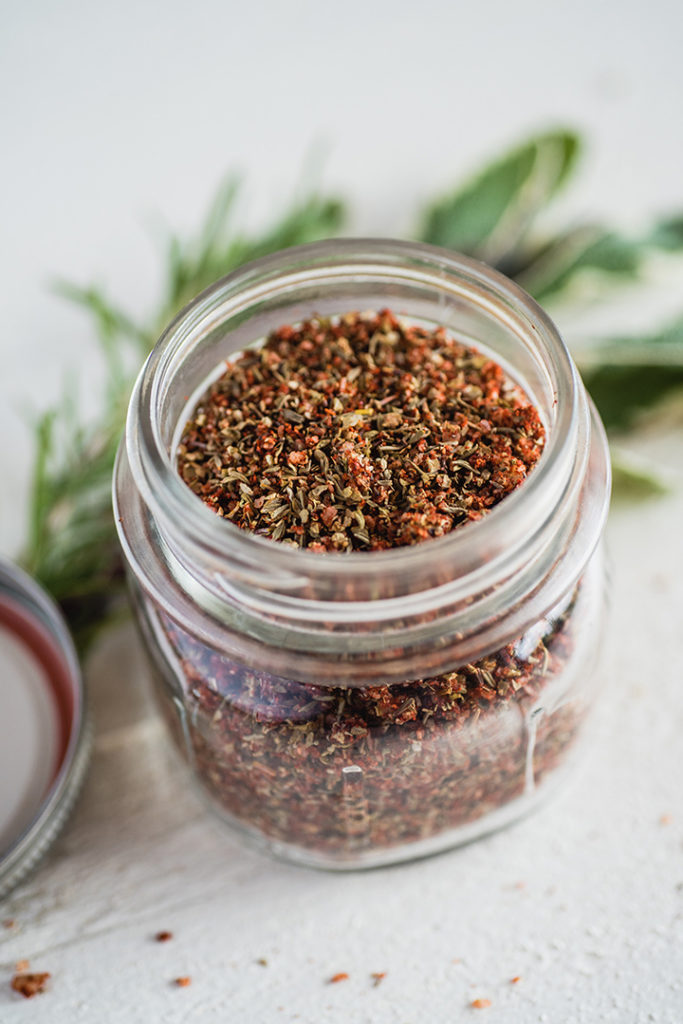
We made our own dry brine by mixing minced garlic, salt, thyme, marjoram, paprika, and black pepper. Isn’t it beautiful? And you won’t believe how good it smells.
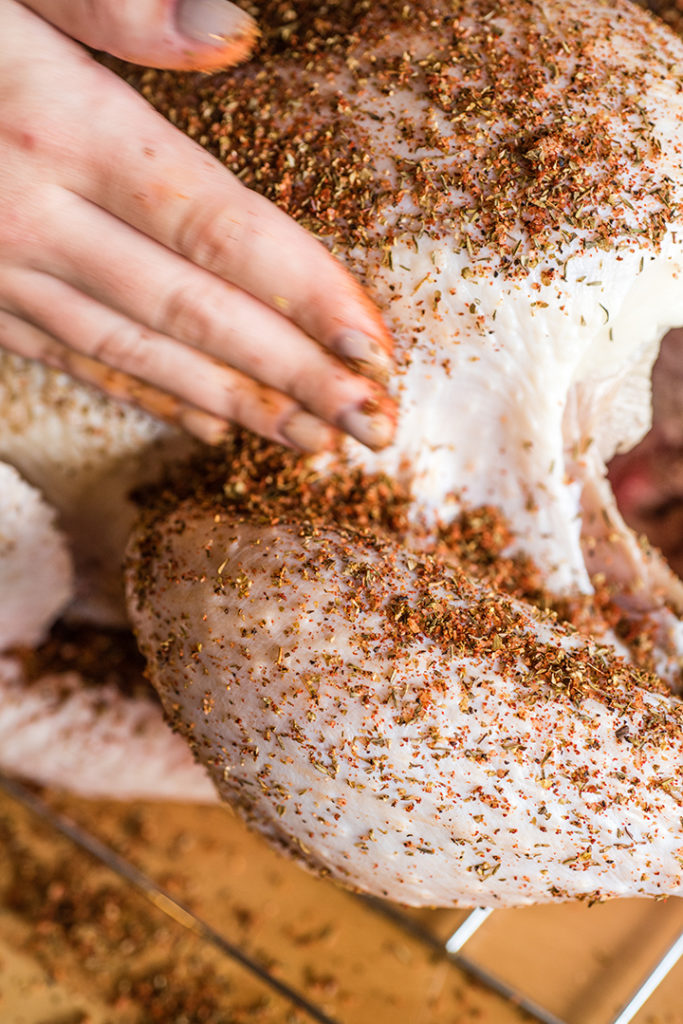
Remove your thawed turkey from the packaging and discard the giblets and neck (or save them for stock or gravy). Pat the turkey dry and loosen the skin over the breast and legs.
Now it’s time to get your hands dirty. Rub the dry brine mixture under the skin, in the cavity, and over the outside of the skin.
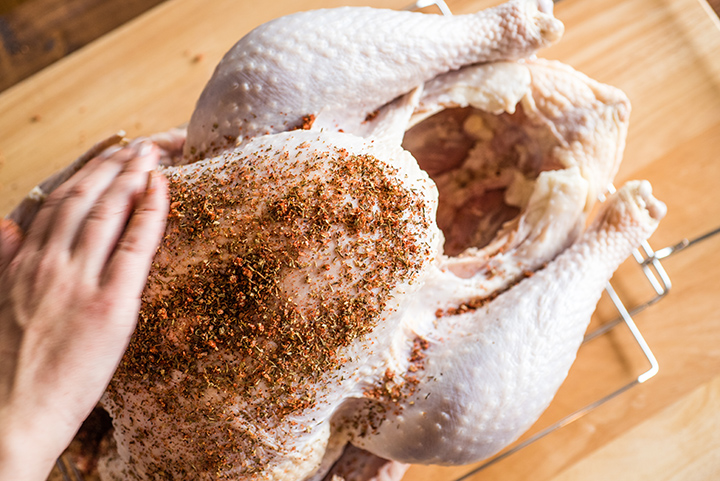
Transfer your turkey (breast-side up) to a rimmed baking sheet and refrigerate (uncovered) for at least one day (or up to three, if you have the time). This is where the magic happens. The salt begins to draw the juices out of the turkey through osmosis (again – make sure your baking sheet has a rim). Then, the salt dissolves into those juices creating a natural brine (without any added liquid, like a wet brine). The liquid is then reabsorbed into the meat, breaking down the tough proteins. It is essentially seasoning and breaking down your meat – leaving you with a flavorful, tender, and juicy bird. Check, check, and check.

When you take the turkey out of the fridge it will look, well, dry. It sits uncovered, allowing the skin to really dry out. With very little moisture left on the surface , you’ll have extra crispy skin when you cook the bird. Isn’t that what everyone wants for a holiday meal?!
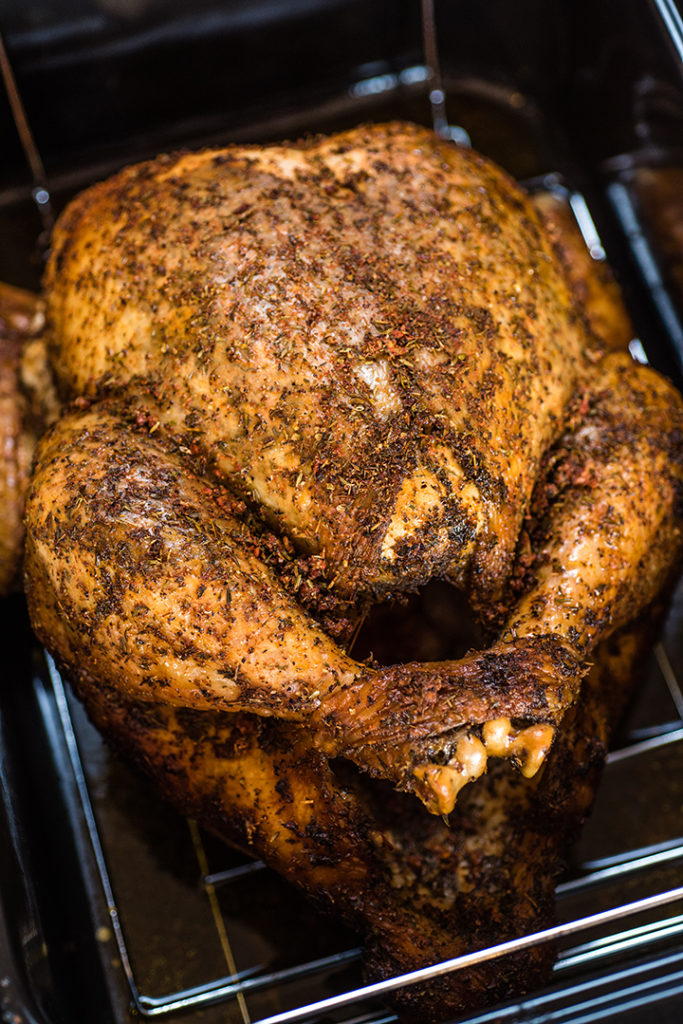
Before you cook the bird, heat your Hamilton Beach® Roaster Oven to 325 degrees. Put the dry-brined turkey on the rack and stuff the cavity with celery and onion. You could also add fresh herbs – like rosemary – or citrus for even more flavour.
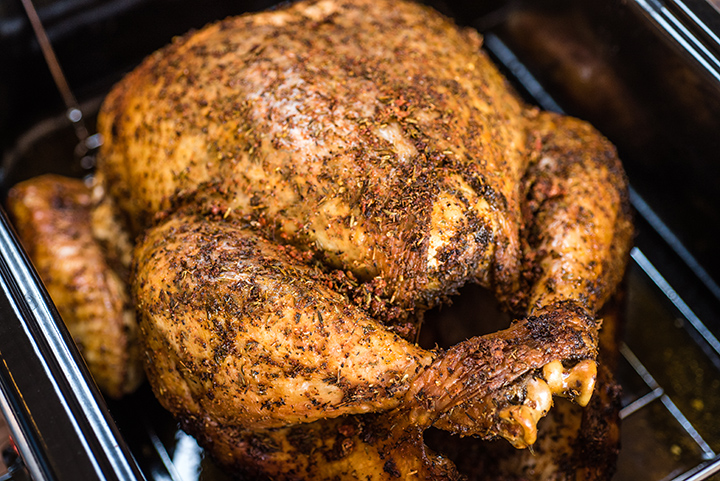
Place the turkey and rack into the roaster oven and cook for 2 to 3 hours or until the meat reaches 165 degrees F.
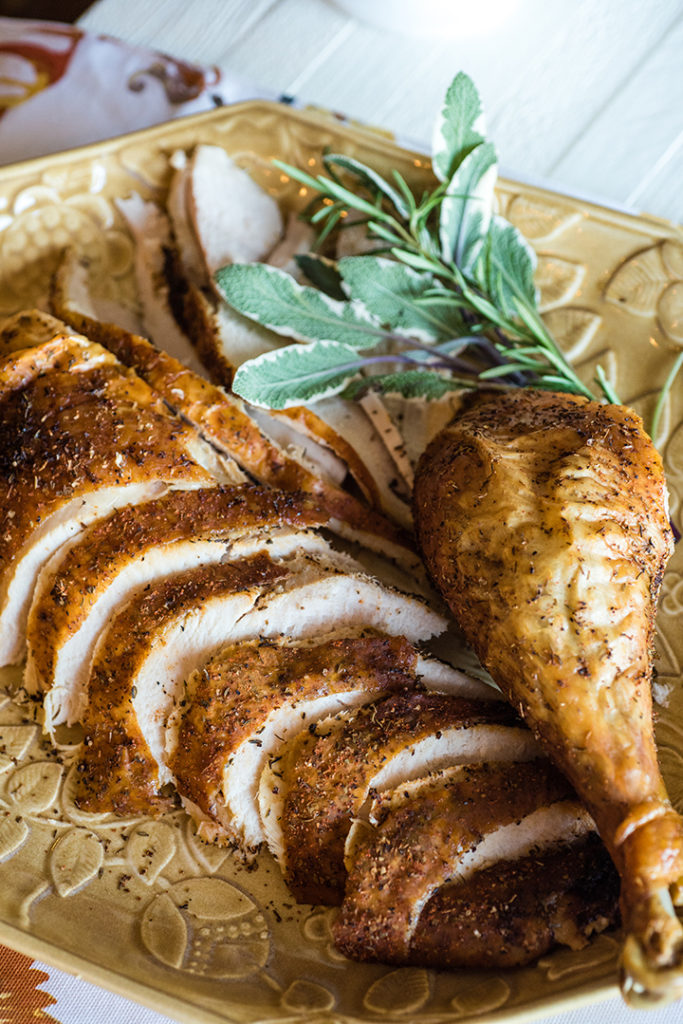
What you bring to the table proves to be well worth the long wait in the fridge. This turkey is flavor-packed and moist. Dare I say it doesn’t even need gravy? It’s that good. Put your trusted wet brine bucket away and take the dry road this holiday season.

- 5 cloves garlic minced
- 1/4 cup kosher salt
- 3 tablespoons dried thyme
- 3 tablespoons dried marjoram
- 2 tablespoons smoked paprika
- 1 tablespoon coarse black pepper
- 16-18 lb turkey, fresh or thawed
- 4 ribs celery, cut in chunks
- 1 large onion, cut in wedges
- In a small bowl, combine garlic, salt, thyme, marjoram, paprika and black pepper. Set aside.
- Remove turkey from the packaging and discard or save giblets and neck for another use. Pat turkey dry.
- Carefully loosen the skin of the turkey over the breast and the thick part of the legs.
- Rub the turkey with the dry brine mixture under the skin, in the cavity and over the outside of the skin on breast and legs.
- Tuck the wings back and tie legs if necessary. Place the turkey breast-side-up in a rimmed baking sheet and refrigerate uncovered for at least 1 day or up to 3 days.
- Remove the rack from the roaster oven. Cover and heat roaster oven to 325°F.
- Place turkey on rack. Stuff cavity with celery and onion.
- Using handles on rack, place rack with turkey in roaster oven and cook 2 to 3 hours or until meat thermometer registers 165°F.
Test Kitchen Tips:
- For food safety, turkey must reach an internal temperature of 165 degrees F. Visit www.foodsafety.gov for more information on safe internal cooking temperatures.
- Always thaw a frozen turkey in the refrigerator, not at room temperature. A 12-15 pound frozen turkey will take 2-3 days to thaw in the refrigerator. If pressed for time, this size turkey can be thawed in cold water in 6-9 hours. Be sure to change the water often.
- The roaster oven cooks a turkey in less time than a regular oven, but use a meat thermometer to make sure your turkey is thoroughly cooked.
- Turkey cooked in a roaster oven will be very moist, but less brown than a traditionally roasted turkey. Seasoning rubs add flavour and enhance the appearance of a roaster oven cooked turkey.
TAGS: brine, holiday, roaster oven, turkey
CATEGORIES: From the Test Kitchen, Holidays
