Tag Archives: blender

There are few things more refreshing on a hot summer day than a slice of fresh watermelon.  The juicy, sweet fruit is super satisfying – and not to mention hydrating – on a 90 plus degree day. Transform it into a watermelon coconut sorbet (expertly crafted in a blender), and you’ve got the ultimate icy treat to cool you down.

Watermelon Sorbet

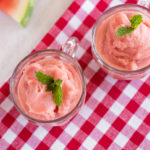
While I love the simplicity of a slice of watermelon in the summer, I also love the idea of transforming one of summer’s best fruits into a tasty frozen treat. Watermelon and coconut sorbet with mint combines some of summer’s best flavors into one delicious dessert that will cool you and your family off in no time.

First freeze 2 pounds of watermelon, sliced into 2-inch cubes.

Watermelon Sorbet

Blend coconut milk, sugar, lime juice, and mint leaves in a blender jar and blend the mixture on PUREE for 30 seconds.  Add half of the frozen watermelon and PULSE until smooth. Using a tamper, add the remaining watermelon, pulsing until the mixture is well blended. If you don’t have a tamper with your blender, you may need to stop the blending and mix the sorbet with a spoon.

Watermelon Sorbet

The coconut milk in the sorbet smooths the texture while the mint and tangy lime juice perfectly complement the sugary-sweet watermelon. Serve this bright pink sorbet in bowl with an extra sprig of mint on top and prepare to fall in love with fresh watermelon all over again.


Minty Watermelon and Coconut Sorbet
Votes: 0
Rating: 0
You:
Rate this recipe!
Print Recipe
Servings
8
Servings
8
Minty Watermelon and Coconut Sorbet
Votes: 0
Rating: 0
You:
Rate this recipe!
Print Recipe
Servings
8
Servings
8
Ingredients
Servings:
Units:
Instructions
  1. Place coconut milk, sugar, lime juice and mint leaves in a blender jar. Blend 30 seconds on PUREE.
  2. Add half of the watermelon and PULSE until smooth. Using a tamper, gradually add remaining watermelon, PULSING until well blended.
  3. Serve immediately or store in an airtight container in freezer.
Share this Recipe


Turmeric, best known for it’s use in curries, seems to be popping up everywhere, in a variety of recipes – everything from hummus to smoothies to dry rubs.

This bright yellow spice is both a powerful antioxidant and anti-inflammatory, and is commonly used to add rich spice and color to dishes.

Roasted Cauliflower and Turmeric Soup

The Test Kitchen wanted to include turmeric in a soup and decided that the spice would complement roasted cauliflower beautifully.

Roasted Cauliflower and Turmeric Soup

For Roasted Cauliflower Soup with Turmeric, drizzle cauliflower florets, one shallot and a clove of garlic with olive oil and bake for about 30 minutes at 400 degrees, until the cauliflower is fork tender. Add vegetable broth, roasted cauliflower, garlic, shallot, sugar, salt, turmeric, cumin and pepper to the Hamilton Beach Professional Blender jar. Cover and PUREE for 1 minute. Then pour half and half into the filler cap and PULSE until the soup is well blended.

Roasted Cauliflower and Turmeric Soup

We garnished this rich and creamy soup with roasted chickpeas and fresh cilantro for an added crunch and pop of color, but topping it with a little extra roasted cauliflower or even some sriracha for additional spice would be delicious.

Roasted Cauliflower and Turmeric Soup

Serve this creamy soup with a buttery baguette for dipping and say hello to one of your new fall staples.

Roasted Cauliflower and Turmeric Soup

Roasted Cauliflower Soup with Turmeric
Votes: 0
Rating: 0
You:
Rate this recipe!
Print Recipe
Roasted Cauliflower Soup with Turmeric
Votes: 0
Rating: 0
You:
Rate this recipe!
Print Recipe
Ingredients
Servings:
Units:
Instructions
  1. Heat oven to 400°F. Foil-line a 13x9-inch baking pan and spray with nonstick cooking spray.
  2. Add cauliflower florets, shallot and garlic to prepared pan. Drizzle with olive oil.
  3. Bake for 15 minutes and stir. Bake an additional 15 minutes until fork tender.
  4. Add broth, cauliflower and garlic, shallot, sugar, salt, turmeric, cumin and pepper in blender jar. Cover and PUREE for 1 minute.
  5. Pour half and half into filler cap. PULSE until blended.
  6. Serve with chopped cilantro.
Share this Recipe


Incorporating beets is a great way to add a pop of color (and not to mention nutrients) to any dish. Spiralize them into ribbons and they are that much more beautiful. If you’re used to roasting or juicing beets, this salad is a great way to mix things up. Skip the sheet pan tonight and start spiralizing.

Spiralizer Beet Salad

Using the 3-in-1 Electric Spiralizer, spiralize 6 beets into ribbons using the ribbon disc. Then boil the beets in a large saucepan and cook them for about 1 or 2 minutes, until they are tender. Remove the beets from the saucepan and chill them in an ice bath, then drain and dry the beets with paper towels.

Spiralizer Beet Salad

Arrange fresh greens (you could use spinach, arugula or your favorite lettuce), beet ribbons, and orange segments on a salad plate and top with crumbled goat cheese and toasted walnuts for an added crunch.

Spiralizer Beet Salad

Top your colorful salad with a citrusy vinaigrette. Blend orange juice, vegetable oil, rice vinegar, honey, thyme, salt and pepper in no time in your personal blender. Dress your salad and you’re ready to eat.

Spiralizer Beet Salad

There are few better combinations than beets and goat cheese, but if you’re not a fan of goat cheese, top this salad with crumbled feta instead. The soft, salty cheese complements the earthiness of the beets while the citrus slices and zesty dressing add sweetness. This salad would make a nice side to your favorite protein or can be served by itself as a hearty lunch.

Spiralizer Beet Salad

Spiralizer Citrusy Beet Salad
Votes: 0
Rating: 0
You:
Rate this recipe!
Print Recipe
Servings
8
Servings
8
Spiralizer Citrusy Beet Salad
Votes: 0
Rating: 0
You:
Rate this recipe!
Print Recipe
Servings
8
Servings
8
Ingredients
Servings:
Units:
Instructions
  1. Using a spiralizer, make ribbons of beets. Fill a large saucepan two-thirds full of water and 2 teaspoons salt. Over high heat, boil water. Add beet ribbons and cook until tender, 1 to 3 minutes. Chill in an ice bath. Drain and dry ribbons with paper towels.
  2. To make dressing, in a single-serve blender, add orange juice, oil, vinegar, honey, thyme leaves, garlic, remaining 1 teaspoon salt, and black pepper. Blend until slightly thickened.
  3. On a salad plate, arrange fresh greens, beet ribbons and orange segments. Top with goat cheese and toasted walnuts.
Share this Recipe


If your New Year’s resolution starts in the kitchen, it’s likely you have one of the following goals on your 2018 to-do list – incorporate more smoothies into your morning routine, save some money by making your own juice at home (those wheatgrass shots and juice bar drinks add up), eat more fruits and vegetables. These are all achievable goals if you have the right appliances in your kitchen and the right information to get started.

Fresh juice and smoothies are extremely popular post-holiday season as people put away the casserole dishes and the cookie tins. If you can’t decide whether a juicer or a blender (or both) is right for your kitchen, our Test Kitchen experts are here to help.

Revitalizing Berry Juice

While juicers and blenders are both great appliances to help add more nutrition into your diet, there are some key differences.

Carrot Turmeric Tonic

Juicers make it easy to get all the fruits and vegetables you need in one thirst-quenching glass. Juice is extracted from the fruits and vegetables leaving little pulp or fiber. The result is  concentrated nutrition in a cup that’s easy to drink and digest. What’s great about juice, experts say, is the nutrients are highly concentrated, so you don’t have to drink a lot of it to reap the benefits. Some of our favorite juice recipes include carrot turmeric tonic, energizing green juice with broccoli, celery and apple, and dawn delight red juice with beets.

Carrot Turmeric Tonic

Blenders can create hunger-satisfying smoothies that are thicker and packed with fiber, so you may feel full longer. But they can also make so much more – like soups, nut butters, marinades, and salad dressings. Unlike juicers, blenders let you add in extra ingredients like yogurt, protein powder, and chia seeds to provide additional nutrition and flavor in your smoothies. You can even swap the straw for a spoon and add toppings like honey and granola to a smoothie bowl. We’re currently loving these smoothie recipes – cucumber melon smoothie, berry blast protein smoothie, and everything green power smoothie. You can also use your blender to make whole juice. Blend fruits and vegetables together without removing the pulp or adding anything extra to the mix (like yogurt, something you might add to make a smoothie).  Try our detox whole juice with apple cider vinegar.

Green Power Smoothie

Both appliances are great ways to increase the nutrition in your diet by introducing more fruits and vegetables (remember your goal to eat more fruits and veggies? Check). Selecting the appliance that fits best into your lifestyle is the true key to success. Do you want to ward off hunger by drinking nutrient-rich smoothies packed with fiber and enhanced with nut butters or yogurt? A high-performance blender fits your bill. Or, do you want a juice that’s nutrient-dense and thirst-quenching? A juicer will do the job.

Center Stage: Banana Peach Green Smoothie with @asimplepantry from Everyday Good Thinking, the official blog of @hamiltonbeach

Whether you’re juicing your way through January or want your mornings to be smooth(ie) sailing – it’s all about the end product and your nutrition goals.


I don’t know about you but whenever I’m eating (or drinking) my greens, I feel a whole lot better about my meal. Whether it’s a loaded kale salad, a mug of steaming hot matcha tea, the perfect avocado (you know what I’m talking about), or sauteed spinach, green things are pretty delicious. And this green power smoothie is no exception.

Green Power Smoothie

As you can see in the photos, all the ingredients (besides the apple juice) you need for the smoothie are – you guessed it – green.

Green Power Smoothie

Add apple juice, a granny smith apple, half an avocado, green grapes, kale, and ice to your blender jar. Cover and blend until all the ingredients come together into one gorgeous, green smoothie.

Green Power Smoothie

The avocado adds to the rich green color. It also makes the smoothie silky smooth. If you’ve never added an avocado to your smoothie, now’s the time to try it.

Green Power Smoothie

Green Power Smoothie

Drink your greens alongside the rest of your breakfast or whip it up in the when you’re in need of an afternoon pick-me-up. It’s an abso-fruitly delicious smoothie recipe you’ll make over and over again.

Green Power Smoothie