Summer is here and that means we’re doing all we can to stay cool. In my house, that usually involves frozen treats – and lots of them. Ice cream, sorbet, popsicles, snow cones, you name it. Why wait for the ice cream truck to make its way down the street when you can make all of the above in the air-conditioned comfort of your own home? We can’t stop making these homemade snow cones – and when you try them, you’ll see why.
Snow cones couldn’t be easier to make. Get the entire family involved. The kids can help make the syrups or pack the “snow” before enjoying this classic summer treat.
First, make your syrup. In a large saucepan over medium-high heat, bring water to a boil. Add sugar and stir until the sugar completely dissolves.
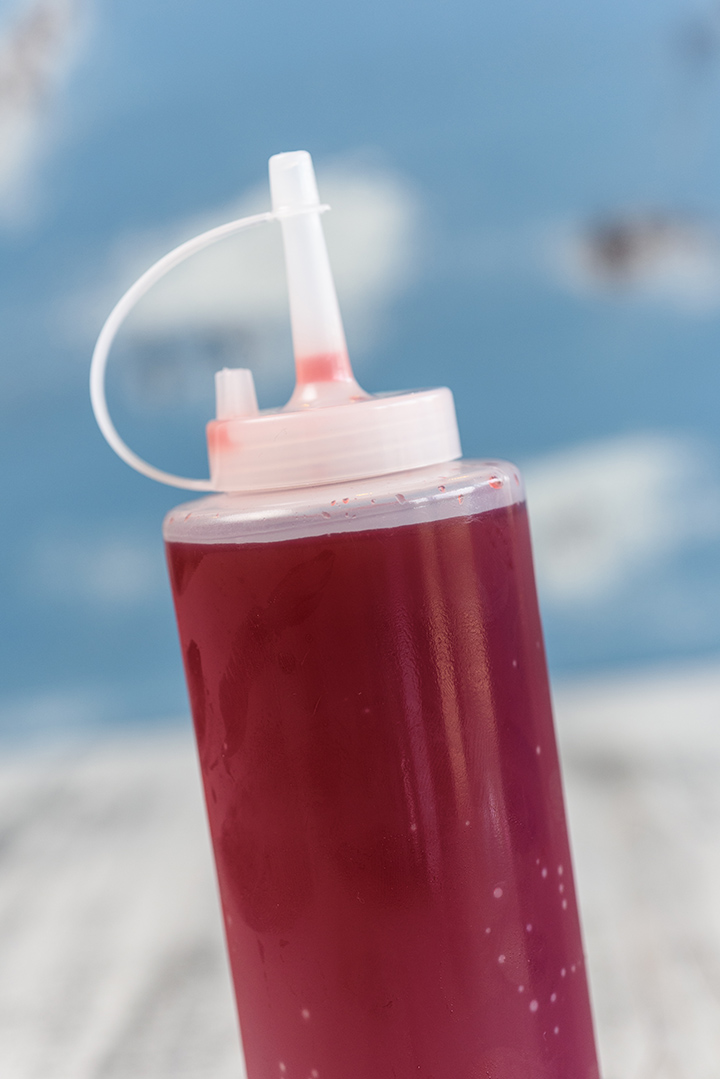
Divide the simple syrup evenly between 4 medium bowls (if you want more than four flavours/colours, you can easily increase the recipe). Add an envelope of powdered drink mix (like Kool-Aid) to each bowl. This is when you can recruit the kids’ help. Have them stir the drink mixes (you might want to make sure they’re suited with an apron in case of spills) until they are fully dissolved. Let the mixture cool and ta-da! You have a variety of colourful, flavoured syrups to use on your snow cones. We bought some handy plastic bottles online – and highly recommend them for if you prefer to keep the snow cone-making mess to a minimum.
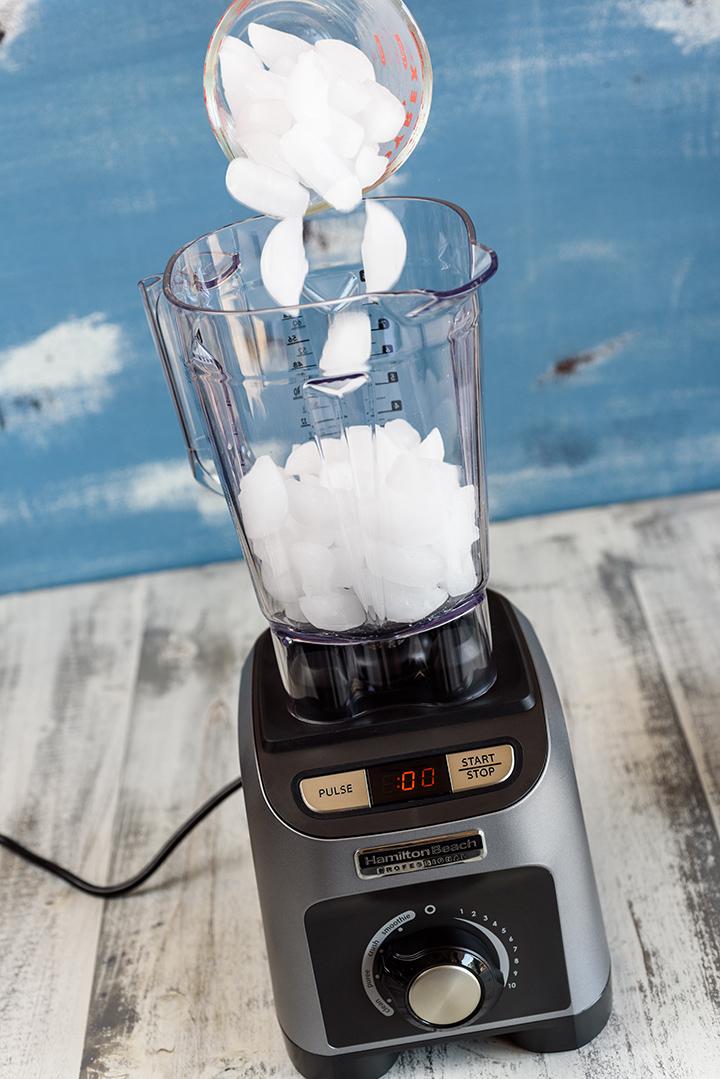
Now for the snow. We used the Hamilton Beach® Professional Peak Power Blender to turn our ice from cubes into “snow.”

Place ice cubes in the blender jar. Cover and process on “ICE CRUSH” or pulse until ice is completely crushed and snow-like.

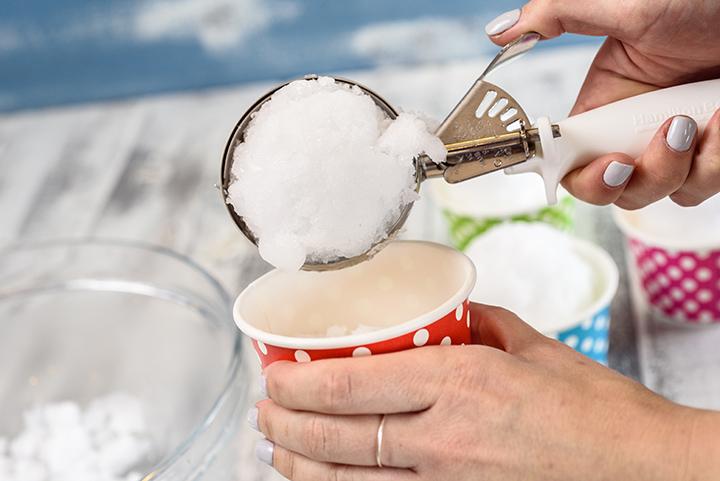
Transfer the crushed ice to a bowl. The next step is critical for your snow cone-making success. Sprinkle 1 to 2 tablespoons of water over ice and mix thoroughly with a spoon or a spatula. The extra water adds a little moisture to the ice, making it easy to pack for your snow cones. You know that perfect snow for snow-ball making? Same idea here.

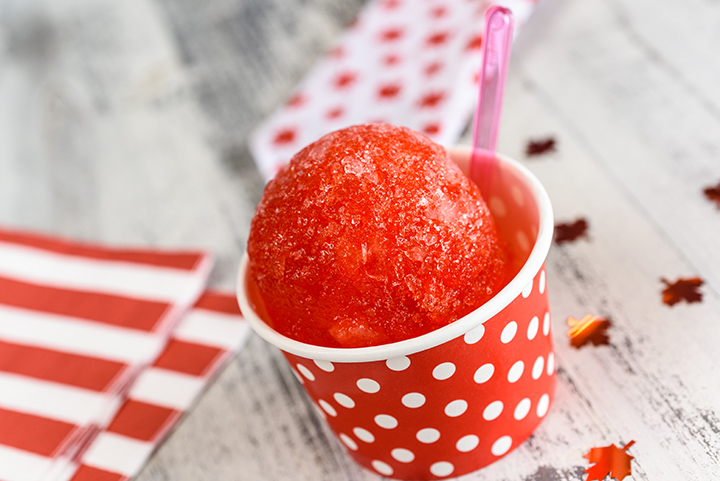
Use an ice cream scoop to shape ice into balls and place in cups for serving. We ordered these colorful cups and spoons online but you could order classic paper cones or use bowls or plastic cups you already have on hand.
Once the ice is packed, it’s time for the syrups. Mix and match to make a colorful snow cone or keep it simple and use one syrup per cone. The family will have fun finding their favourite flavour and colour combinations. There’s never a bad time for snow cones.


- 4 cups water
- 4 cups sugar
- 4 envelopes powdered drink mix
- 4 cups crescent-shaped ice cubes
- 1 - 2 tablespoons Tablespoons water
- In a large saucepan over medium-high heat, bring water to a boil. Add sugar and stir until sugar is dissolved.
- Divide syrup evenly between 4 medium bowls. Add an envelope of powdered drink mix to each bowl. Stir until drink mixes are dissolved and thoroughly blended into syrups. Cool.
- Using a funnel, pour each flavored syrup into squeeze bottles. Refrigerate until cold.
- Place ice cubes in blender jar. Cover and process on ice crush or pulse until ice is completely crushed. Transfer ice to a large bowl. Sprinkle water over ice and mix thoroughly. Use an ice cream scoop to shape ice into balls and place in cups for serving. Drizzle with flavoured syrup.
- Store remaining syrups in the freezer for next use.
TAGS: Canada Day, kids, Snow cones, summer
CATEGORIES: Canada Day, Summertime


