Tag Archives: roaster oven

St. Patrick’s Day is a great excuse to pick up a corned beef brisket and make an Irish feast for dinner. Since there’s plenty of room in the Hamilton Beach® 22-quart roaster oven, we decided to cook the main course and sides together. This roaster oven corned beef and cabbage with potatoes is the perfect meal for feeding a green-wearing crowd.

Roaster Oven Corned Beef & Cabbage

Rinse the corned beef and pat it dry. Then place it on the roaster oven rack. Place the meat into the roaster oven on the rack and pour chicken broth and corned beef seasoning (it will come in a packet when you purchase the meat at the grocery store) over top.

Roaster Oven Corned Beef & Cabbage

Cover and cook for 2 ½ to 3 hours at 325 degrees.

Roaster Oven Corned Beef & Cabbage

Remove the roaster oven lid and cover the meat with a simple glaze (made of brown sugar, ketchup, and mustard). Arrange your sides – cabbage and potatoes – around the roaster oven. Cover and cook for an additional hour until the meat is fully cooked and the potatoes are fork tender.

Roaster Oven Corned Beef & Cabbage

What’s great about this corned beef and cabbage recipe is that it all cooks together in the roaster oven. You can leave the stove off completely or use it to make other St. Paddy’s favourites like shepherd’s pie or green velvet cupcakes for the kids. Slice the corned beef and return it to the roaster oven so your party guests can serve themselves or plate everything together for a festive family dinner. If you’ve got the luck of the Irish, you’ll have leftovers to make corned beef reuben sandwiches throughout the week.

Roaster Oven Corned Beef & Cabbage

Roaster Oven Corned Beef and Cabbage
Votes: 1
Rating: 4
You:
Rate this recipe!
Print Recipe
Servings
14
Servings
14
Roaster Oven Corned Beef and Cabbage
Votes: 1
Rating: 4
You:
Rate this recipe!
Print Recipe
Servings
14
Servings
14
Ingredients
Servings:
Units:
Instructions
  1. Remove rack from roaster oven. In roaster oven insert pan, stir together broth and spice packets.
  2. Heat roaster oven to 325°F.
  3. In a small bowl, stir together brown sugar, mustard and ketchup. Set aside.
  4. Rinse corned beef and pat dry. Place on rack.
  5. Use roaster rack to carefully place corned beef in roaster oven. Pour broth mixture over corned beef.
  6. Cover and roast for 2 ½ to 3 hours.
  7. Spread brown sugar mixture on top and sides of meat. Arrange cabbage and potatoes around meat.
  8. Cover and cook 1 hour or until meat is fork tender.
  9. Remove cabbage and potatoes to a serving bowl.
  10. Using oven mitts, remove to a cutting board. Let meat stand 10 minutes. Remove meat from rack before slicing.
Share this Recipe


If you already plan on cooking your turkey in the roaster oven this Holiday season, plug it in a day or two early and get your baking out of the way before the big day.

Roaster Oven Cheesecake - Ergonomic Hand Mixer

That’s right – your trusted Hamilton Beach® Roaster Oven can do so much more than cook the bird. This year use it to make dessert.

This roaster oven cheesecake recipe proves the versatility of this appliance. It cooks to perfection and frees up the oven for more Turkey Day meal prep.

Roaster Oven Cheesecake

First, pour 3 quarts of hot water into the roaster oven insert pan. Cover the pan and heat to 325 degrees.

While the roaster oven is heating up, butter the bottom and sides of a 10-inch springform pan. Then sprinkle graham cracker crumbs evenly over the bottom and sides. Or try crushed up vanilla wafers for a twist on a classic. This is your cheesecake’s “crust.”

Roaster Oven Cheesecake

In a mixing bowl, beat 6 packages of room-temperature cream cheese. We’ve been using our Hamilton Beach® ErgoMix Hand Mixer all season long. The position of this mixer’s handle allows you to keep your elbow lowered and your wrist in a neutral position while mixing. Trust us, you’ll be way more comfortable during those holiday baking marathons.  Add sugar and beat until smooth, then slowly add the eggs. Pro tip: Let the eggs come to room temperature before beating them into your batter. Eggs beat to a greater volume if they’re at room temperature, leaving your cheesecake with a more uniform consistency.

Roaster Oven Cheesecake

Pour your batter into the springform pan then cover with aluminum foil. This protects the cheesecake from the condensation inside the roaster oven. The last thing you want is water dripping down onto your cheesecake while it bakes.

Roaster Oven Cheesecake with Caramel Topping

Carefully place the cheesecake on the rack then place rack back into the roaster oven. Bake for 1 ½ hours.

Roaster Oven Cheesecake with Caramel Topping

When the cheesecake is done, life the rack from the roaster oven and let cool (with the foil on) for 15 minutes.

Remove the foil then cool completely. Refrigerate for a few hours or, if you have the time, overnight.

Roaster Oven Cheesecake with Caramel Topping

The best thing about this recipe? You can make it a day or two ahead of time and have it waiting in the fridge. All you have to do day-of is add your toppings.

Roaster Oven Cheesecake with Cherry Topping

Want to dress up this cheesecake for your holiday or NYE party? Cover it with cherry pie filling or crushed candy canes. Bake this cheesecake and discover the versatility of your roaster oven.

How to Make a Cheesecake in your Roaster Oven
Votes: 0
Rating: 0
You:
Rate this recipe!
Print Recipe
Servings
14
Servings
14
How to Make a Cheesecake in your Roaster Oven
Votes: 0
Rating: 0
You:
Rate this recipe!
Print Recipe
Servings
14
Servings
14
Ingredients
Servings:
Units:
Instructions
  1. Remove rack in roaster oven. Pour 3 quarts hot tap water into insert pan. Cover and heat to 325°F. (Use 300°F for dark or nonstick coated pans.)
  2. Generously butter bottom and sides of a 10-inch springform pan. Sprinkle crumbs evenly over bottom and sides of pan.
  3. In a large mixing bowl at medium speed, beat cream cheese until smooth. Add sugar and continue to beat until smooth. Slowly add eggs. Beat until smooth. Stir in lemon juice and vanilla extract. Pour into prepared springform pan.
  4. Place pan on rack. Cover springform pan with aluminum foil. (This prevents condensation in roaster oven from dripping onto cake.) Carefully place rack and pan in roaster oven.
  5. Bake 1 1/2 hours. Carefully remove cheesecake by lifting rack and from roaster oven. Cool covered with aluminum foil for 15 minutes. Remove foil and cool completely. Refrigerate several hours or overnight. Top with cherry pie filling.
Share this Recipe


It’s never too early to think about the holidays so let’s talk turkey. There’s a lot of meal planning to do ahead of a holiday meal – and the turkey is top priority. There are a few things you need to decide before the big day.

First, how many mouths do you need to feed? This will help determine the size of the bird you need to buy (and how long it will take to thaw & cook). Next, how are you going to season it? You can do a wet brine, dry brine, a simple spice rub, stuff the cavity with your favourite veggies – there are too many options to list. But this will ensure you put your tastiest turkey on the table. Finally, how are you going to cook it? You can use a roaster oven, slow cooker (for smaller turkeys or just the turkey breast), or your standard oven. Decisions, decisions.


This holiday season we are feeding a crowd with this dry-brined turkey. We’ve done wet brines in the past, but dry brining is a great (and honestly a little bit easier) option.

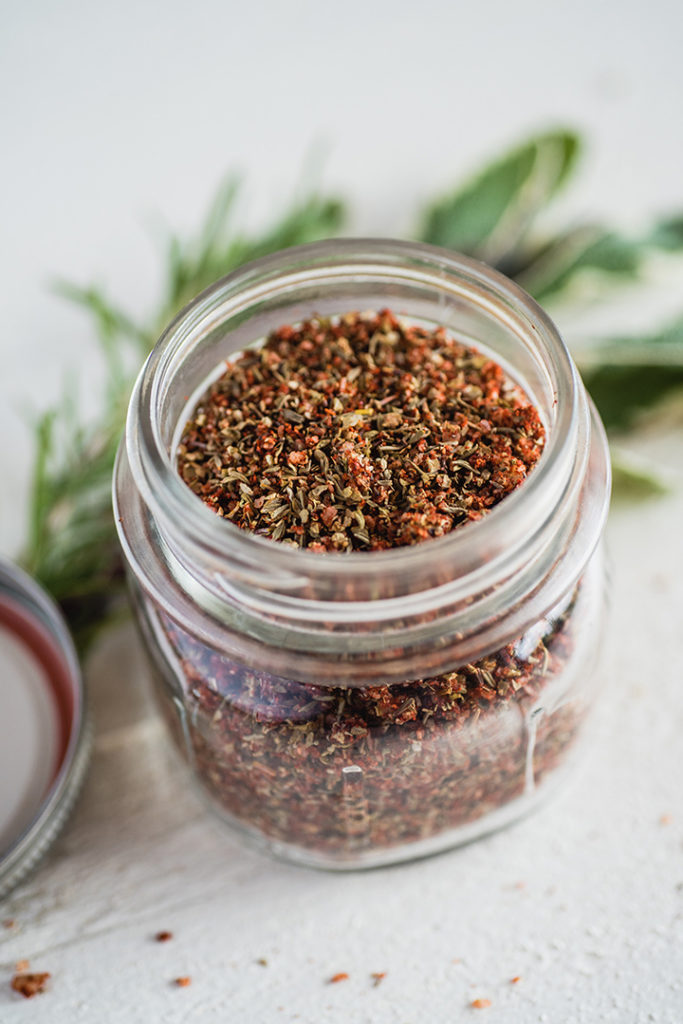
We made our own dry brine by mixing minced garlic, salt, thyme, marjoram, paprika, and black pepper. Isn’t it beautiful? And you won’t believe how good it smells.


Remove your thawed turkey from the packaging and discard the giblets and neck (or save them for stock or gravy). Pat the turkey dry and loosen the skin over the breast and legs.

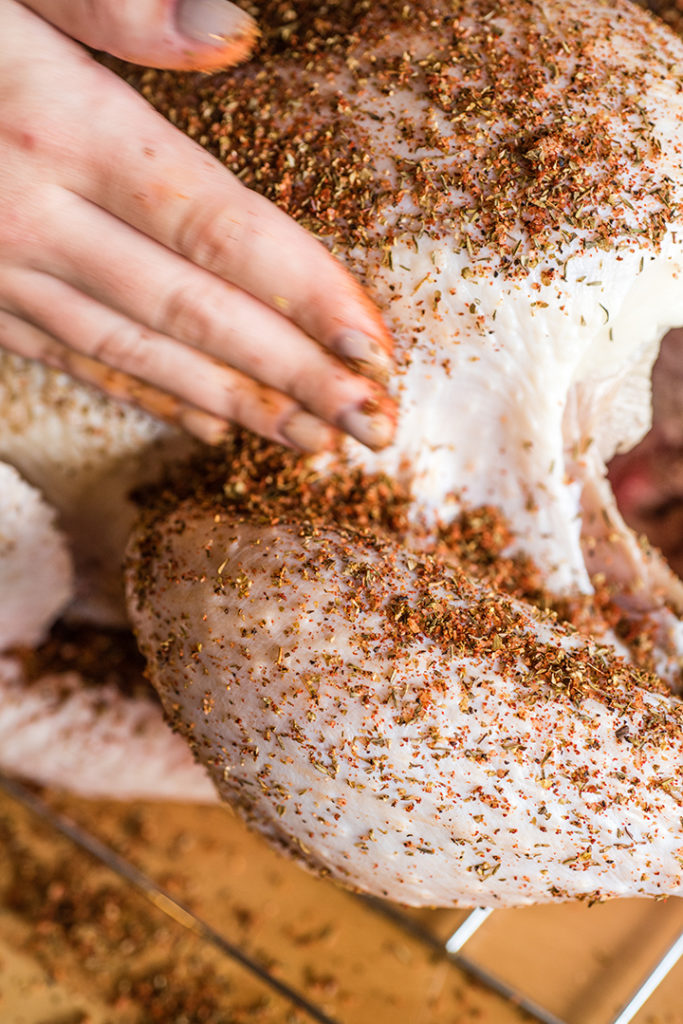
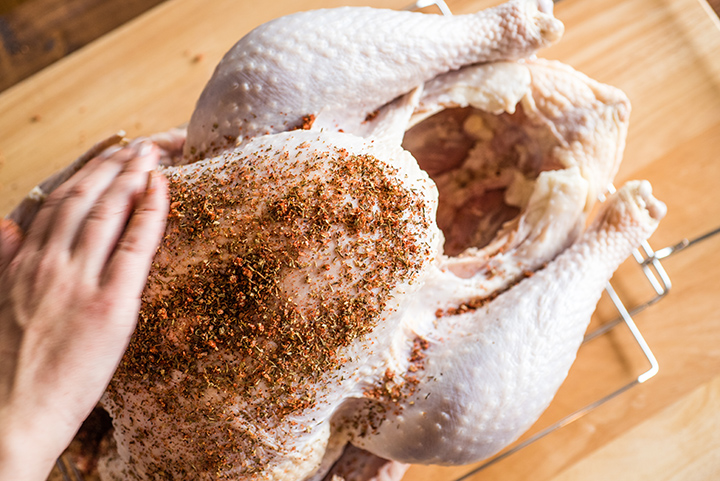
Now it’s time to get your hands dirty. Rub the dry brine mixture under the skin, in the cavity, and over the outside of the skin.


Transfer your turkey (breast-side up) to a rimmed baking sheet and refrigerate (uncovered) for at least one day (or up to three, if you have the time). This is where the magic happens. The salt begins to draw the juices out of the turkey through osmosis (again – make sure your baking sheet has a rim). Then, the salt dissolves into those juices creating a natural brine (without any added liquid, like a wet brine). The liquid is then reabsorbed into the meat, breaking down the tough proteins. It is essentially seasoning and breaking down your meat – leaving you with a flavorful, tender, and juicy bird. Check, check, and check.

When you take the turkey out of the fridge it will look, well, dry. It sits uncovered, allowing the skin to really dry out. With very little moisture left on the surface , you’ll have extra crispy skin when you cook the bird. Isn’t that what everyone wants for a holiday meal?!


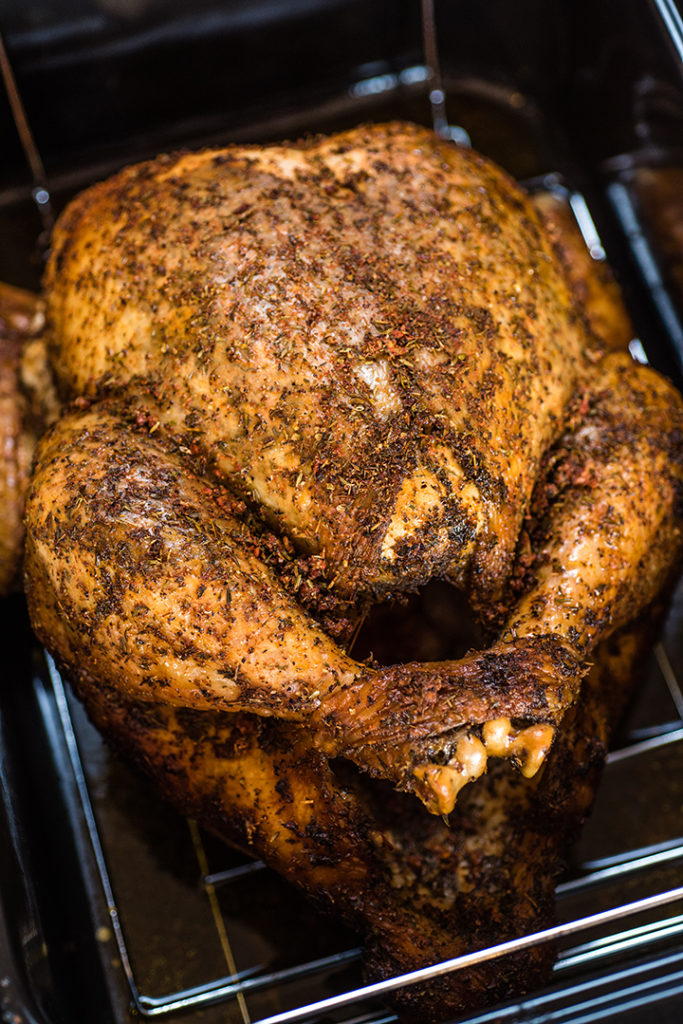
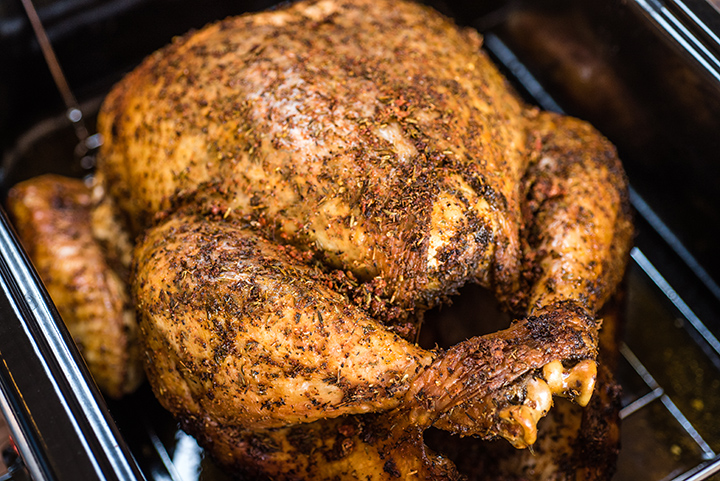
Before you cook the bird, heat your Hamilton Beach® Roaster Oven to 325 degrees. Put the dry-brined turkey on the rack and stuff the cavity with celery and onion. You could also add fresh herbs – like rosemary – or citrus for even more flavour.

Place the turkey and rack into the roaster oven and cook for 2 to 3 hours or until the meat reaches 165 degrees F.


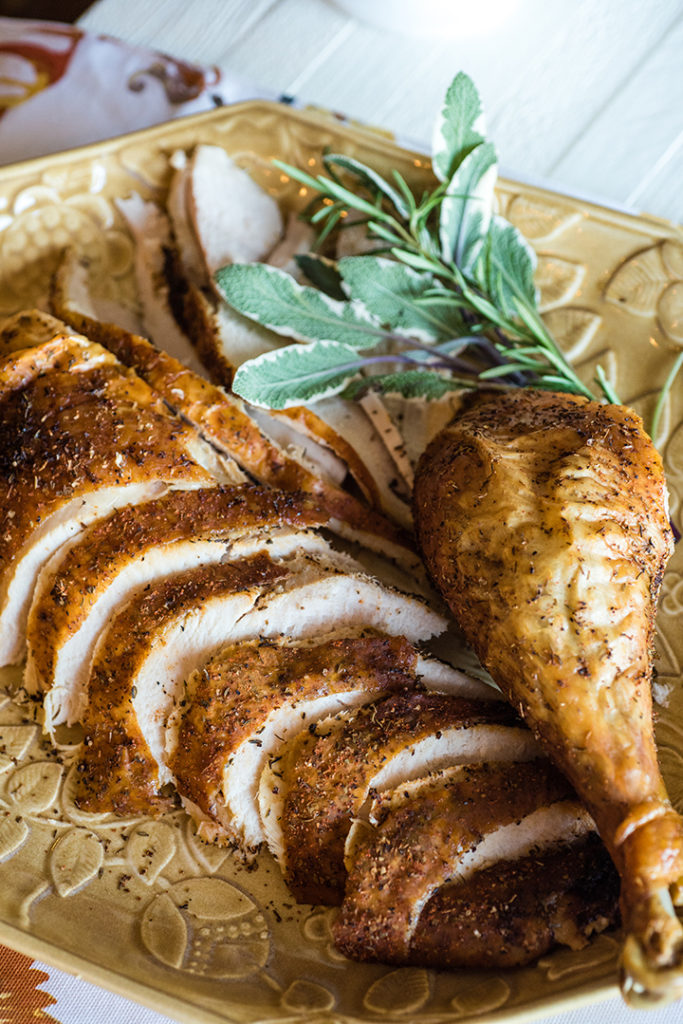
What you bring to the table proves to be well worth the long wait in the fridge. This turkey is flavor-packed and moist. Dare I say it doesn’t even need gravy? It’s that good. Put your trusted wet brine bucket away and take the dry road this holiday season.


Dry Brine for Turkey
Votes: 0
Rating: 0
You:
Rate this recipe!
Print Recipe
Servings
12
Servings
12
Dry Brine for Turkey
Votes: 0
Rating: 0
You:
Rate this recipe!
Print Recipe
Servings
12
Servings
12
Ingredients
Servings:
Units:
Instructions
  1. In a small bowl, combine garlic, salt, thyme, marjoram, paprika and black pepper. Set aside.
  2. Remove turkey from the packaging and discard or save giblets and neck for another use. Pat turkey dry.
  3. Carefully loosen the skin of the turkey over the breast and the thick part of the legs.
  4. Rub the turkey with the dry brine mixture under the skin, in the cavity and over the outside of the skin on breast and legs.
  5. Tuck the wings back and tie legs if necessary. Place the turkey breast-side-up in a rimmed baking sheet and refrigerate uncovered for at least 1 day or up to 3 days.
  6. Remove the rack from the roaster oven. Cover and heat roaster oven to 325°F.
  7. Place turkey on rack. Stuff cavity with celery and onion.
  8. Using handles on rack, place rack with turkey in roaster oven and cook 2 to 3 hours or until meat thermometer registers 165°F.
Recipe Notes

Test Kitchen Tips:

  1.  For food safety, turkey must reach an internal temperature of 165 degrees F.  Visit www.foodsafety.gov for more information on safe internal cooking temperatures.
  2. Always thaw a frozen turkey in the refrigerator, not at room temperature.  A 12-15 pound frozen turkey will take 2-3 days to thaw in the refrigerator.  If pressed for time, this size turkey can be thawed in cold water in 6-9 hours.  Be sure to change the water often.
  3. The roaster oven cooks a turkey in less time than a regular oven, but use a meat thermometer to make sure your turkey is thoroughly cooked.
  4. Turkey cooked in a roaster oven will be very moist, but less brown than a traditionally roasted turkey.  Seasoning rubs add flavour and enhance the appearance of a roaster oven cooked turkey.
Share this Recipe


Nothing com-pears, nothing com-pears, to you. Are you singing yet? Prince said it first, but this fall we’re saying it again. With apples and pumpkins in the limelight this time of year, it’s easy to forget about pears. But don’t.

Pears

There are many different types of pears – from Asian, to Bartlett, to Comice. But Bartlett pears are most commonly found at the grocery store and are light green/yellow in color (their colour changes as they ripen). They’re slightly sweet and extremely juicy – and “pear-shaped” in every sense of the description.

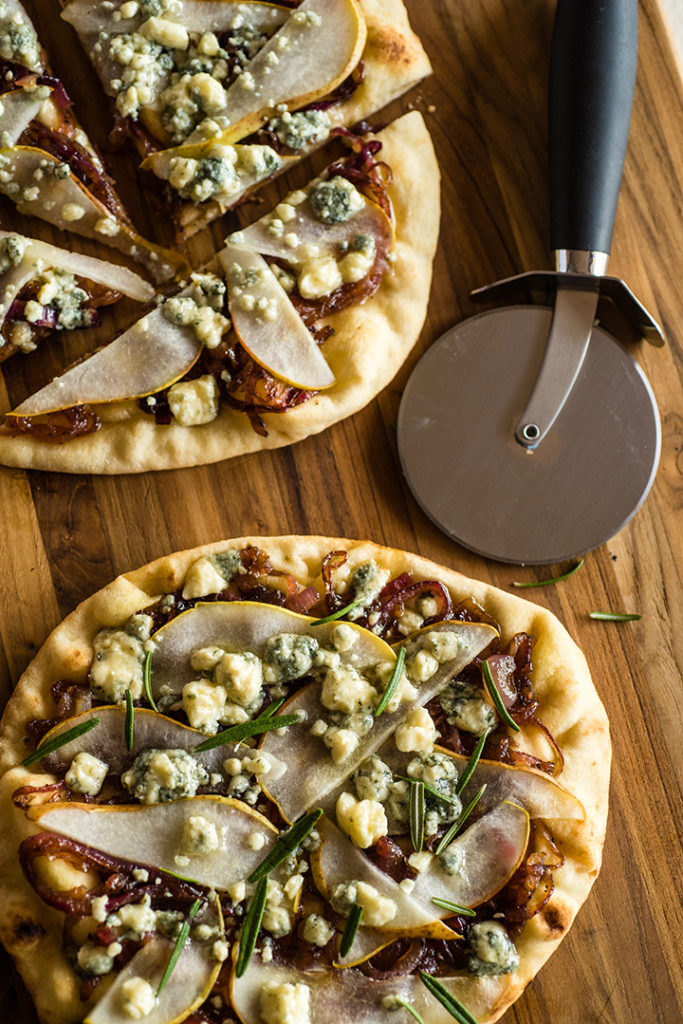
We hope these three recipes will get your excited to incorporate pears into your menu this fall. Set aside the apples and the pumpkin puree for a day and prepear to fall in love with one of our favourite seasonal ingredients.

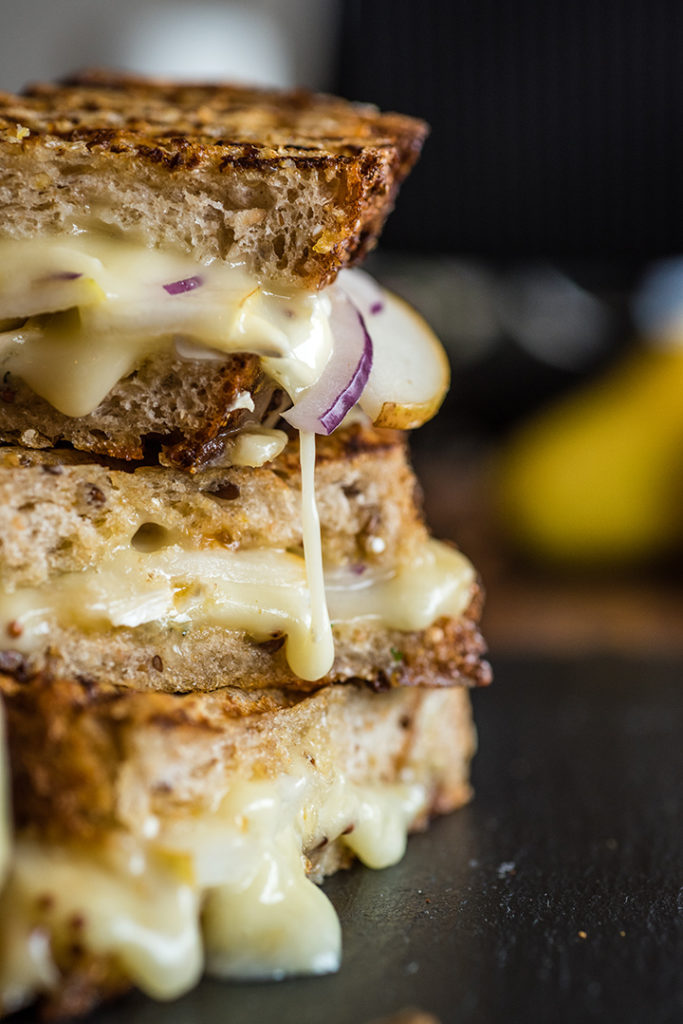
Pear & Brie Panini


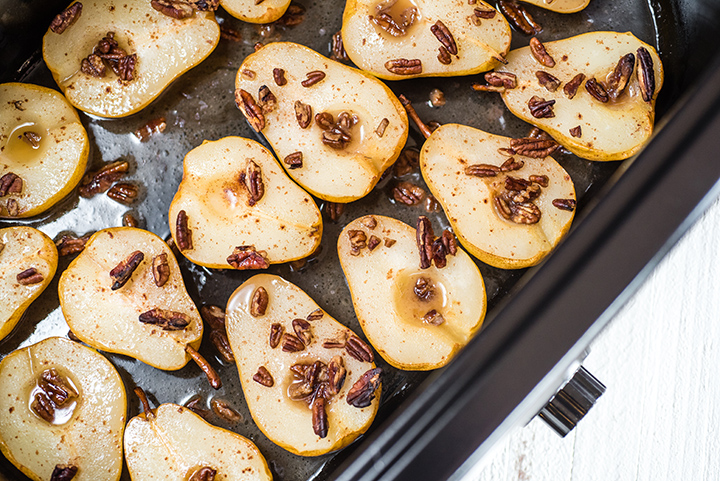
Roaster Oven Pears with Pecans


Pear & Gorgonzola Naan Pizza


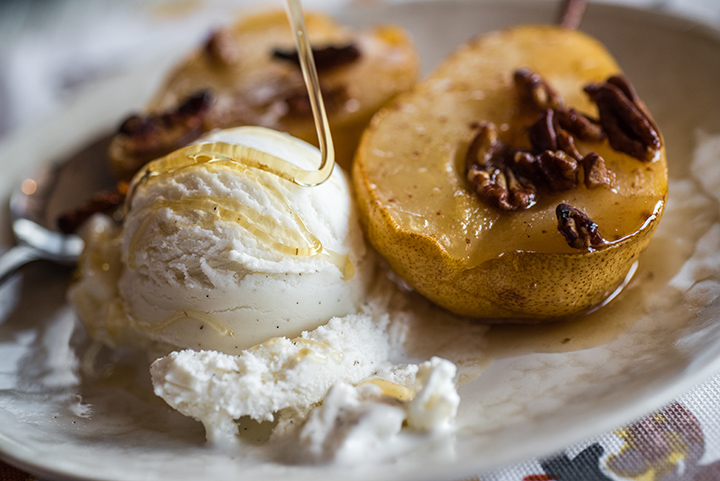
While it’s easy to get carried away with lattice pie crust and whipped cream, it’s nice to keep things simple in the dessert department. In this recipe, pears do all the talking. They are cooked in the Hamilton Beach® roaster oven with pecans and a mixture apple juice, brown sugar, butter, and cinnamon (Y.U.M). Serve this beautiful, no frills dessert at a fall dinner party or pear-ed with your after dinner coffee on special occasions.


Roaster Oven Pears with Pecans
Votes: 0
Rating: 0
You:
Rate this recipe!
Print Recipe
Servings
16
Servings
16
Roaster Oven Pears with Pecans
Votes: 0
Rating: 0
You:
Rate this recipe!
Print Recipe
Servings
16
Servings
16
Ingredients
Servings:
Units:
Instructions
  1. Heat roaster oven to 400°F.
  2. In a small saucepan over medium, stirring constantly, heat apple juice, brown sugar, butter and cinnamon about 2 to 3 minutes or until brown sugar is dissolved.
  3. Place pear halves skin side down in roaster oven. Pour apple juice mixture over pears. Sprinkle pecan pieces over pears.
  4. Cover and cook 25 to 30 minutes.
  5. Stir sauce in roaster pan and serve over pears with vanilla ice cream. Drizzle honey if desired.
Share this Recipe