Tag Archives: spring

Now that Spring has sprung we all want to get outside and go for long walk or jump in the car for a nice long drive. Traveling can be a lot of fun, and you can avoid headaches and setbacks by planning ahead. Being on the road for a long drive (especially with kids) means preparation. So is trying to find a snack that can pass through airline security. And forgetting a snack means a hungry, cranky child (or driver.) To help you prepare for long spring drives or walks we are sharing our Top Three Trail Mix Snack Ideas. We found our ingredients in the nut and baking aisles, in the snack and candy sections and in the bulk bins at a local grocery store. Substitute ingredients and change it up to make your own personal trail mix.

#1: Trail Mix for Kids

Trail mix is also known in some places as “Gorp” and is a combination of dried fruit and nuts or seeds. Chocolate is optional, but highly encouraged. It was made to keep hikers energized, but these days it’s the perfect travel snack kids can eat with their hands. To make our first mix, we combined equal-sized handfuls of

  • roasted and salted peanuts
  • cashews
  • pretzels
  • raisins
  • banana chips
  • chocolate covered sunflower seeds
  • semi-sweet chocolate chips.

You can add or subtract any ingredients you want and get creative with the process. Perhaps your kids would appreciate the addition of cheese crackers, graham crackers or mini marshmallows. Feel free to add whatever you want to the mix. The kids will love it and can even help make it.

Trail Mix for Kids from Top Three Trail Mix Snack Ideas by Everyday Good Thinking | @HamiltonBeach Trail Mix for Kids from Top Three Trail Mix Snack Ideas by Everyday Good Thinking | @HamiltonBeach

#2: Trail Mix for Adults

When we were discussing trail mix ideas in the Test Kitchen, Pat and I discovered that neither of us loves raisins, but we do enjoy a number of other dried fruits. We have added dried cranberries and other treats in a trail mix that would be equally great for hiking, traveling, or a snack at work. Just combine equal handfuls of the following, substituting ingredients based on your preferences:

  • raw almonds
  • dried mango
  • dried cranberries
  • dark chocolate chips
  • shelled pistachios.

We love the bright colors in this trail mix and the flavors all blend well together. Keep this in your purse in a snack-sized bag for an easy and healthy snack on the go. A few of us here will be keeping this trail mix around the office to quell late-afternoon hunger pangs.

Trail Mix for Adults from Top Three Trail Mix Snack Ideas by Everyday Good Thinking | @HamiltonBeach Trail Mix for Adults from Top Three Trail Mix Snack Ideas by Everyday Good Thinking | @HamiltonBeach

#3: Trail Mix for Entertaining

Trail mix is not just reserved for the trails. It also makes a decadent snack to serve at parties or before a dinner party when guests are pouring the wine. Serve this in a pretty bowl so people have something to snack on, and keep your leftovers for a delicious afternoon pick-me-up. Feel free to substitute ingredients as you like, but we enjoyed this mix of

  • white chocolate chips
  • raw almonds
  • hazelnuts
  • chocolate covered espresso beans
  • dried currants
  • dried strawberry rhubarb pieces
  • shelled pistachios.

Other great ideas for this elevated type of trail mix would be dried pineapple, macadamia nuts, coconut, pepitas, and dark chocolate chunks.

Trail Mix for Entertaining from Top Three Trail Mix Snack Ideas by Everyday Good Thinking | @HamiltonBeach

Top 3 Trail Mix Snack Ideas
Votes: 0
Rating: 0
You:
Rate this recipe!
Print Recipe
Top 3 Trail Mix Snack Ideas
Votes: 0
Rating: 0
You:
Rate this recipe!
Print Recipe
Share this Recipe


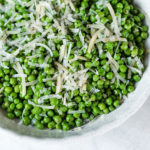
Do you find that you’re always in need of an easy weeknight side dish? We’ve got you covered with these Parmesan Peas.

Whether you need something to serve alongside chicken breasts or just need to make sure the kids are eating enough vegetables, these Parmesan Peas are quick and better yet, easy to make.

Parmesan Peas

Heat the Easy Reach Toaster Oven to 350 degrees. Then add oil and garlic to the toaster oven baking pan and bake for about 5 minutes or until the garlic is lightly browned.

Parmesan Peas

After the garlic is browned, add frozen peas that have been thawed to the pan. Bake the peas for an additional 10-12 minutes until they are heated through.

Parmesan Peas

Transfer the peas into a serving bowl and sprinkle with your favorite parmesan cheese and you’re ready to serve. It’s that easy. The next time you’re in desperate need of a side dish, remember these cheesy peas are ready in under 15 minutes.

Parmesan Peas
Votes: 0
Rating: 0
You:
Rate this recipe!
Print Recipe
Servings
3
Servings
3
Parmesan Peas
Votes: 0
Rating: 0
You:
Rate this recipe!
Print Recipe
Servings
3
Servings
3
Ingredients
Servings:
Units:
Instructions
  1. Heat the toaster oven to 350°F.
  2. In toaster oven baking pan, add oil and garlic.
  3. Bake for 5 minutes or until garlic is lightly browned.
  4. Add peas to the pan.
  5. Bake an additional 8 to 10 minutes or until peas are heated.
  6. Sprinkle with cheese and pepper before serving.
Share this Recipe


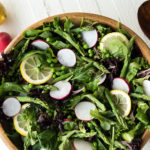
Spring has sprung and we’ve started to lighten – and brighten – things up in the kitchen. We’re swapping winter’s hearty soups and stews for fresh salads. This spring green salad with lemon vinaigrette is the perfect dish to help you dive into your new seasonal menu.

Spring Green Salad

This simple salad is packed with some of our favorite springtime ingredients – asparagus, radish, and spring peas.

Start with your favorite greens, then add blanched asparagus (blanching them will make the spears easier to eat and brighten their color), blanched peas, beautiful red radishes, and some lemon slices for color.

Radishes for Spring Green Salad

The Hamilton Beach® Professional 14-Cup Dicing Food Processor was used to expertly slice the radishes. This food processor comes equipped with an adjustable slicing blade. With 14 thickness settings, the food processor makes it easy to achieve everything from paper thin  radish to thick pepperoni slices in a matter of seconds.

Spring Green Salad

We drizzled this fresh salad with our blender-made lemon vinaigrette. The Hamilton Beach® single-serve blender is great for making quick dressings and marinades. Bottled dressings can be expensive and making your own lets you save a little money and control the ingredients (especially the salt and sugar).  Use yours to blend fresh lemon juice, olive oil, shallot, honey, salt & pepper.

Spring Green Salad Dressing

The citrus dressing is the perfect accompaniment to this spring salad. Serve this spring green salad by itself for a light lunch or serve it alongside grilled chicken or fish for a seasonal supper.

Spring Green Salad

Spring Green Salad with Radishes
Votes: 0
Rating: 0
You:
Rate this recipe!
Print Recipe
Spring Green Salad with Radishes
Votes: 0
Rating: 0
You:
Rate this recipe!
Print Recipe
Ingredients
Lemon Vinaigrette
Servings:
Units:
Instructions
Salad
  1. In a medium saucepan over high, heat 4 cups of water to a boil. Quickly blanch asparagus spears and fresh peas, 30 seconds to 1 minute. Immediately, place in ice water to chill. Drain and set aside. If using frozen peas, defrost in microwave.
  2. Divide greens between 8 salad plates. Arrange asparagus spears, peas and sliced radishes on top of greens. Add one slice lemon to each plate.
  3. Drizzle with Lemon Vinaigrette.
Lemon Vinaigrette
  1. In a single-serve blender, combine olive oil, lemon juice, shallot, honey, salt and black pepper. Blend until smooth.
Share this Recipe


Did you know you could cook an entire chicken in a slow cooker? That’s right. It’s one of the Test Kitchen’s favorite methods for cooking whole chicken. Not only does it allow you to keep the oven off or free it up for making sides dishes or dessert, slow cooking chicken leaves you with a juicy, tender bird.

Slow Cooker Lemon Thyme Chicken

Slow cooker lemon thyme chicken is the perfect springtime recipe to have on hand. Make it to serve for dinner on the patio as the weather warms or for your Sunday meal prep. You could serve it for dinner on Sunday and save leftovers to toss into salads, tacos, or rice bowls throughout the week. Winner winner chicken dinner, indeed.

Slow Cooker Lemon Thyme Chicken

Lemon thyme chicken is especially delicious thanks to a homemade herb butter we put under the skin before cooking. Use a Hamilton Beach® hand mixer to whip butter until it’s light and fluffy. Add parsley, thyme, lemon juice, lemon zest, salt, and black pepper and beat until the herb butter is well blended. Then use your hand to spread the butter under the skin of the chicken breast. It gets a little messy but it’s totally worth the end results.

Slow Cooker Lemon Thyme Chicken

Quarter an onion and add half to the slow cooker crock and gently place the chicken on top. The onions will help lift the bird off of the bottom of the crock, so the lower half of the bird won’t cook in the juices and get soggy. Stuff the cavity with the rest of the onion, herbs, and lemon for a beautiful presentation and to add extra flavor to the meat.  Cook on HIGH for 3 to 4 hours or LOW for 6 to 8 hours.

Slow Cooker Lemon Thyme Chicken

Slow cooker lemon thyme chicken puts the spring in spring chicken. Garnished with extra lemon slices and sprigs of fresh thyme, this beautiful bird will surely fly off the table. Serve with a simple spring salad or shred leftovers for meals throughout the week. No need to pick up a rotisserie chicken at the store when you can make your own whole chicken at home in your slow cooker.

Slow Cooker Lemon Thyme Chicken

Slow Cooker Lemon Thyme Whole Chicken
Votes: 0
Rating: 0
You:
Rate this recipe!
Print Recipe
Servings
6
Servings
6
Slow Cooker Lemon Thyme Whole Chicken
Votes: 0
Rating: 0
You:
Rate this recipe!
Print Recipe
Servings
6
Servings
6
Ingredients
Servings:
Units:
Instructions
  1. Using an electric hand mixer, beat butter on high speed until light and fluffy.
  2. Add parsley, thyme, lemon juice, salt, lemon zest and black pepper. Beat until blended, about 1 minute.
  3. Gently slide one hand under the chicken skin over the breast to loosen the membranes.
  4. Spread butter mixture under the skin of chicken breast.
  5. Add 1/2 of the onion to slow cooker crock. Place chicken on top of onions. Fill cavity with remaining onions and 3 sprigs thyme. Cover and refrigerator overnight.
  6. Cook on HIGH for 3 to 4 hours or LOW for 6 to 8 hours. Chicken is well done when meat temperature registers 165°F in the breast or 175°F-180°F in the thickest part of the thigh.
  7. Garnish with fresh thyme and lemon slices.
Recipe Notes

Test Kitchen Tip: USDA recommends 165°F as the safe eating temperature for chicken. Chicken is done when meat temperature registers 165°F in the breast or 175°F-180°F in the thickest part of the thigh. For more information on food safety, visit foodsafety.gov. Follow steps 1 through 5 to prepare chicken the night before. Cook the chicken following steps 6 and 7.

Share this Recipe