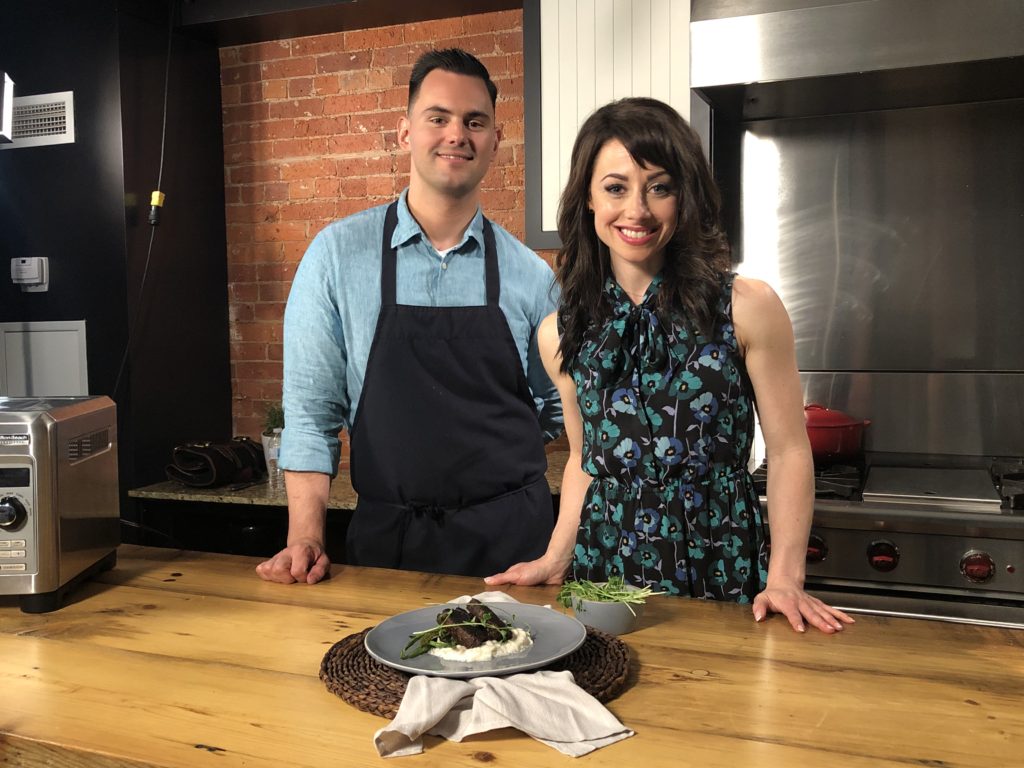
Cook like a professional chef and eat like one too! In our latest #MakeItWithHB episode, host @MirandaMalisani pairs up with professional chef @RolandDucharme to create a delicious meal that’s both satisfying and delicious. The duo swop tips and tricks on how to make healthy choices and cook like a pro, all using the Hamilton Beach Professional Digital Countertop Oven and Professional 7 Speed Hand Mixer. Watch the full video and recreate the recipes at home! https://youtu.be/HHM3a9flY1A
If you haven’t tried making Peruvian chicken (pollo a la brasa) at home, we’ve got the ultimate guide for putting a perfectly seasoned rotisserie-roasted bird on the table.
Whether you’ve tried it at a Peruvian restaurant with fried plantains and rice or picked it up pre-made at the grocery store, Peruvian chicken is making a name for itself. While Peruvian restaurants might do it best, this recipe from our Test Kitchen is pretty close to the real deal. The spice-heavy rub paired with the tangy, refreshing green sauce makes for a flavour combination that’s hard to beat.
To make the slightly spicy and smoky rub for your Peruvian chicken (it’s really the star of the show), mix garlic, soy sauce, sriracha, lime juice, olive oil, cumin, paprika, mustard, chili powder, black pepper, and oregano. Rub the mixture over all sides of your trussed chicken chicken and in the cavity. Need help trussing your bird? Watch this helpful video from the Test Kitchen. Cover and refrigerate overnight so the flavours have time to marry and the bird can marinate.
Before cooking the chicken, secure it on a rotisserie skewer and insert it into your Hamilton Beach® countertop oven. We like this model for it’s rotisserie and convection functions. Roast for 1 to 1 ½ hours or the meat thermometer reads 165 degrees.
While the Peruvian chicken is roasting, make the green sauce for topping or dipping. Using a food processor, blender or food chopper (we love the glass bowl food chopper for this), add cilantro, green onions, jalapenos, garlic, lime juice, and olive oil. Pulse until the mixture is finely chopped, and then add mayonnaise. Pulse until the mixture is combined and you have a beautiful (and immensely flavorful) bright green sauce.
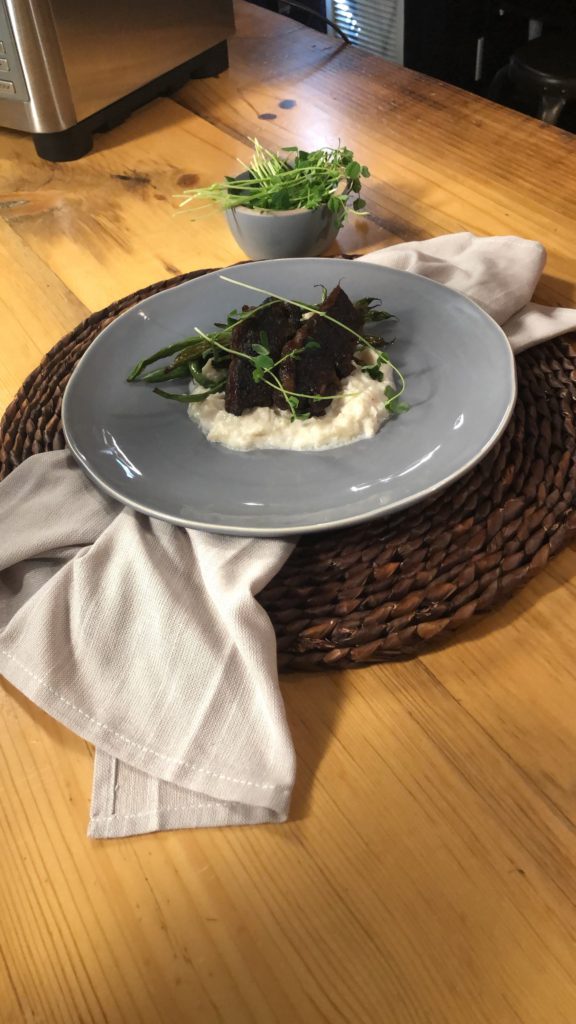
This sauce perfectly complements the roasted chicken. It’s tangy and refreshing, and adds a pop of color to your plate.
Serve this rotisserie Peruvian chicken if you’re craving an out of the ordinary weeknight meal or want to upgrade your Taco Tuesday mains. If you’re a chicken wing fan, this rub makes a great tasting wing, too. Toss them in the spice rub after frying and use the green sauce for dipping while you’re watching your favourite team play on game day.
Peruvian Chicken on the Rotisserie with Homemade Green Sauce
Votes: 0
Rating: 0
You:
Rate this recipe!
Print Recipe
Servings
4
Servings
4
Peruvian Chicken on the Rotisserie with Homemade Green Sauce
In a medium bowl, stir together garlic, soy sauce, sriracha, lime juice, oil, cumin, paprika, mustard, chili powder, salt, black pepper and oregano.
Rub garlic mixture over all sides of chicken and inside the cavity. Cover and refrigerate overnight.
Secure chicken on rotisserie skewer. Insert into oven.
Set oven to rotisserie. Roast 1 to 1 1/2 hours or until meat thermometer reads 165°F.
Meanwhile, in a personal blender or small food processor add cilantro, green onion, jalapenos, garlic, lime juice and olive oil. Cover and pulse until mixture is finely chopped.
Add mayonnaise and pulse until mixture is well blended. Cover and refrigerate until ready to serve.
To some, baking a potato seems like a pretty easy task. Baking the perfect baked potato is another story.
There are lots of ways to bake a potato. You can throw your taters in the microwave or put your potatoes in the oven.
While the perfect potato has a lot to do with personal preference, the Test Kitchen is here to provide you with step-by-step instructions for the tastiest tubers.
First, heat your oven (or toaster oven) to 400 degrees (or 375 if using convection). Then give your potatoes a good wash. We used a firm vegetable brush to scrub the potatoes, but be sure to avoid stiff brushes that break the skin.
Then use a fork to pierce the potatoes in the shape of cross on one side. Piercing prevents the potatoes from bursting open in the oven. The cross shape is where you will open or “blossom”( we’ll get to that later) the potatoes before serving.
Once the potatoes are pierced, rub the skin with a little vegetable oil. The oil will help the skin get crispy while the potatoes bake.
Before baking, sprinkle the tops of the potatoes with salt for added flavour.
If you’re used to wrapping the potatoes in aluminum foil before baking, don’t this time. When the potatoes are fully covered, they steam instead of bake. You’re left with soft, mushy potatoes instead of potatoes with a crispy skin.
Instead, put a sheet of aluminum foil on the oven rack and place the potatoes on top (in a single layer). The foil will catch the oil and salt, preventing dripping onto the bottom of the oven and making a mess you’ll have to clean later.
Bake for 50 minutes to an hour or until the potatoes are tender.
Before serving, pierce the potatoes again in the same place as before. Then hold the potatoes at both ends and squeeze towards the middle. This technique is called “blossoming” and makes for a beautiful presentation.
Whether you’re eating your baked potatoes with a pat of butter and a little extra salt and pepper or adding everything but the kitchen sink on top for a loaded potato, these are delicious any and every way.
The next time you reach for a bag of spuds, remember these tips and tricks for making the best baked potato.
Choose a firm vegetable brush to scrub the potatoes. Avoid stiff bushes that break the skin.
Pierce the potatoes in the shape of a cross over the top of the potatoes. Piercing prevents the potatoes from bursting in the oven. The cross shape is where you will open the potatoes when they are ready to serve.
Rub the skin of the potatoes with a little vegetable oil to make them shiny and crisp in the oven.
Sprinkle the tops with salt for added flavour.
Tear off a sheet of aluminum foil and place on the oven rack. Forget wrapping the potatoes in foil. It steams them instead of baking. Placing foil on the oven rack prevents the oil and salt from dripping in the oven and making a mess.
Place the potatoes in a single layer on the sheet of foil.
Bake 55 to 60 minutes or until the potatoes are tender.
To serve, use a fork to pierce again in the cross area. Press the ends towards the center. The Idaho Potato Commission calls this the “Blossoming” technique. The potato will push upward and be more fluffy than if cut with a knife.